Monday, August 13, 2012

No Bake Peanut Butter Bars

Whoops, it's been awhile since I posted on here. Guess that's what happens when you get engaged, move across the country and start your career. Literally my last post was the day before I got engaged! Ha!

My fiancé and I are road-tripping back across the country tomorrow - to get MARRIED! So, I've been gathering food and decided to bake some treats as well. The chocolate chip cookies look good, but I needed something else. (Partly because I'm a stress eater.)

I found this recipe, and not only does it involve my favorite ingredient EVER - peanut butter, but there's no cooking involved! And, it's kind of low sugar. I split the original recipe in half and made it a little more diabetic friendly.

You'll need:
2 cups of crushed graham crackers (about one sleeve)
A bag of chocolate chips (unless you want a thinner chocolate layer)
1 stick of butter (or 1/2 cup)
1/2 cup of peanut butter
1/4 cup coconut flakes (completely optional)


Combine the crushed graham crackers with the peanut butter and pour in your melted butte (this is where I also poured in the coconut - for a little extra flavor and sweetness). Mix it all together until it looks like the peanut buttery goodness of a Reese's. I made this in an 8x6 pan (the size used for making bread and such). Spread the "crust" evenly across the pan. I melted the chocolate chips on the stove until it became runny enough to spread over the crust. Chill for about one hour and enjoy!

Tuesday, February 14, 2012

Cupcake-in-a-Mug

This little treat came from my grandma. Her and a friend tried this the other day, and of course, she thought I might like to try it.

You just need to buy a box of angel food cake mix, and then any other flavor of cake mix you desire. She had red velvet, but I tried strawberry.

I don't know if all angel food mix is like this, but the one I bought had two different bags - one for the cake mix, and one for the egg white mix. I only used the cake mix.

Pour the two mixes in a bag or bowl, shake it up until it's all mixed together.


Scoop out three tablespoons of your "cake" mix, into a coffee mug. I used about two tablespoons of water, even though I think she told me one. It was about the consistency of when you first combine pudding mix and milk.

I microwaved for about two minutes, but just watch to make sure yours is fully cooked, but doesn't explode inside your microwave :)

Ta-da! Cupcake! I like this method much better than baking a whole batch of cupcakes, because once they're made, it's hard not to keep eating them. And, you don't have the extra calories from three eggs + oil that the mix usually requires.

Thursday, February 9, 2012

Salad in a Jar

Yes, you read that title correctly. Some of you may have seen me talking about this already, but in case you haven't seen it or tried it - I'm here to show you.

I love a good salad. (I'm known to go to Olive Garden and just eat salad.) But, it's hard to conveniently take a salad to work... unless you put it in a jar.

Buy a mason jar, and all your salad ingredients.

Put your dressing on the bottom (it's kind of a guessing game as to how much...), and then all your toppings in after that.

I've been doing quinoa, dried cranberries, bell pepper, mushrooms, tomatoes, cheese. For my meat, I either use canned chicken or torn up deli meat (you better believe it's turkey, no way is it ham!)

The MOST important part of this trick is that your dressing is on the very top, and your lettuce/spinach is at the very top, with your toppings in the middle. I would say my jar is about half toppings, half lettuce. Make sure to leave some room at the top, because if it's too full, it doesn't shake up very well.


Take your jar to work (luckily I have a huge supply of plastic forks I can use up!), and when you're ready to eat, just shake it up! It usually takes a few minutes to shake up - I shake it every which way possible to mix it good enough.

Presto! I usually get some weird looks if people walk into my little office and I'm eating out of a mason jar, but they realize how good of an idea it is once I explain. :) I usually eat some crackers of some sort to go along with my salad. Either saltines + turkey pepperoni, or Cheez-its. (Fun fact: Cheez-its and Teddy Grahams are healthier than Club Crackers; no high fructose corn syrup or partially hydrogenated oil!)

(No rating for this post - healthiness and cost differ on what you use!)

Saturday, January 28, 2012

Diet Coke Brownies

I love brownies - more than cake or cookies.

I haven't made brownies since I've been to college, so I figured I would treat myself tonight.... and try a new recipe! I was a little scared to try it, but they were great!

Just buy a brownie mix (I bought Pillsbury), and Diet Coke. I went to Dollar General, and the mix was $1, and they had mini bottles of Diet Coke - so I bought one for $1. I figured, well, if it doesn't turn out then I only wasted $2!

It is really soupy, since there's no egg or oil in it like usual, but don't worry - still bakes fine! The very bottom layer didn't fully bake, and was kind of gooey... which I completely loved. Rather than the usual brownie texture, they're spongey like cake :)

and you save about 60 calories making brownies this way!

Rating:

Thursday, January 26, 2012

Mini Mexican Pizzas

I am a sucker for Taco Bell... and all things that are actually Mexican food. So, I saw this healthy option for a new Mexican dish, and decided it was worth a shot. SO good! And, as usual, incredibly easy to make.

You'll need:
 - 3-4 large whole wheat tortilla’s, or enough to cut out 12 small circles (I use La Tortilla Smart & Delicious LowCarb/High Fiber Tortillas)
- 1 pound of hamburger (or turkey meat)
- 1/2 cup salsa of choice
- Dry taco seasoning
- 1/2 cup low fat mozzarella
- Optional Toppings: sliced black olives, bell peppers, chopped tomatoes
- Muffin pan


Preheat oven to 425 degrees.

Cook the hamburger meat, and mix in the taco seasoning.

Use an empty can, glass cup, or cookie cutter to cut 3-4 medium circles out of each tortilla. Make sure to spray the pan! Press the circles into each muffin cup using your fingers. It doesn't have to go reach up to the rim of each cup, but it'll make it cleaner! Mix together the meat, salsa, and toppings. Stir until well combined. Scoop a tablespoon (or so) of the mixture into each tortilla. Top with cheese and olives.

Bake for 12-15 minutes. (My oven can be a little crazy sometimes, but I only cooked mine for five...)

Rating:

Friday, January 20, 2012

Green Monster Shake

A co-worker told me about this shake, and after finding various recipes I decided to try my own version! I made this using my Magic Bullet.

Ingredients:
1-2 cups of spinach
4 spoonfuls of Greek yogurt
2 Tbsp of peanut butter
1/2 cup of 1% milk (or whatever kind you drink)
Few spoonfuls of old-fashioned oats
1/2 Tbsp of honey
(optional: I put in a few mixed berries)

Blend until it's all mixed! These measurements were a little estimated, so you can increase/decrease. I also meant to put bananas in there... haha!

It didn't turn out "green" but it sounded like no one's really did. It was delicious!


Rating:


Thursday, January 19, 2012

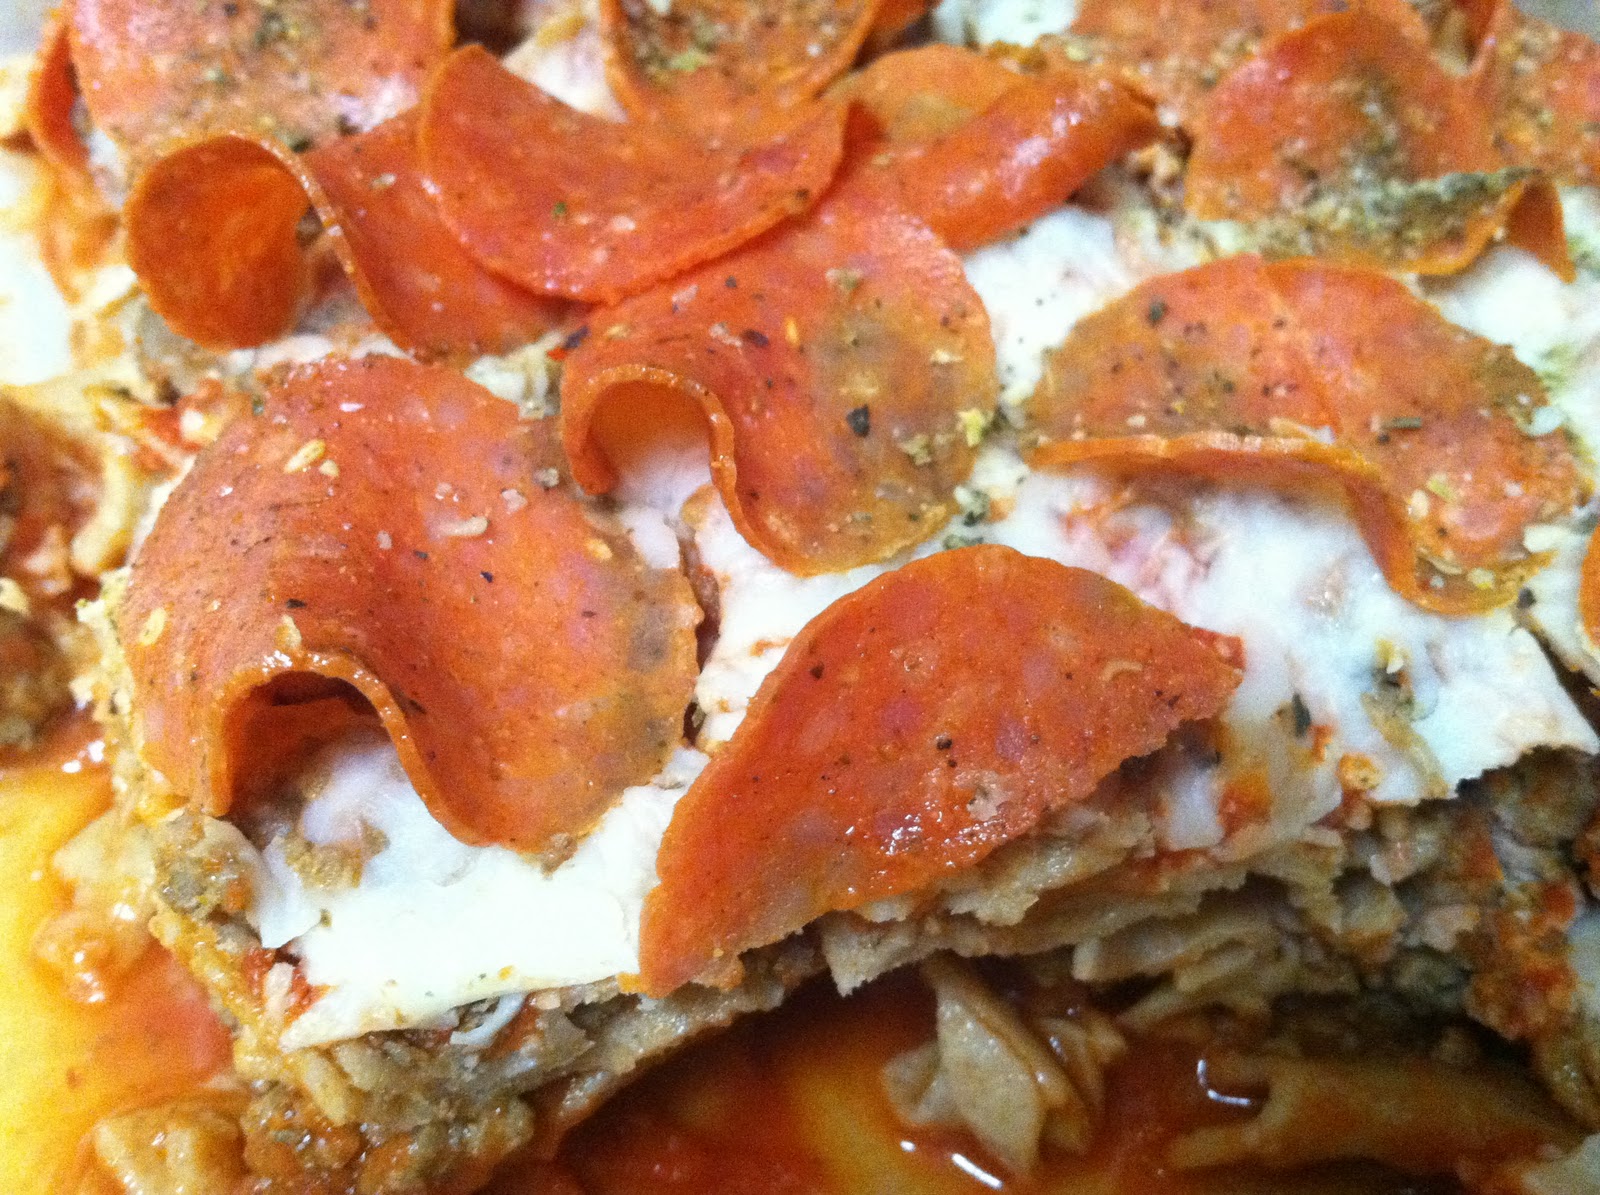
Pizza Casserole

Okay, so another little splurge on this recipe. But, I would consider it a little healthier than pizza, and its easy to make!

You'll need:
1 bag of egg noodles (I bought whole grain!)
1 extra large can of pizza or spaghetti sauce
3 cups of mozzarella cheese (or more if you like cheese)
1 1/2 pounds of hamburger meat (or sausage, turkey meat, etc.)
1 package of turkey pepperoni


Preheat the oven to 350.

Cook your hamburger and noodles.

The rest is layering... I used a cake pan, but you can use a glass dish as well.

Spread a thin layer of sauce,
then half the noodles,
half the meat,
half the sauce,
rest of the noodles,
(somewhere in here, sprinkle in some Italian seasoning!)
half the cheese,
rest of the meat,
rest of the sauce,
rest of the cheese,
and then layer pepperoni on top!


Cover with foil and bake for 30 minutes.
Then, remove the foil and bake for another 15 minutes.

Let it cool for 10 minutes or so - this is important to let everything settle, otherwise it'll just fall apart.


Rating:

Mini Egg Frittatas

I've been wanting to try this for awhile, and luckily I got a muffin pan for Christmas... so I made these last night! You can put 'em in the freezer and then heat them up during the week!

Ingredients:
5 eggs
1/2 tsp. salt
Assorted mix-ins
 - I used turkey pepperoni, bell pepper and tomato.


Preheat your oven to 350.

Whisk together your egg and salt, distribute evenly between six of the muffin cups.
Drop in however much of each mix-in you want in each cup.

Bake for 20-25 minutes, they should be puffy and the edges should be brown!


Rating:

Friday, December 23, 2011

Sweet Potato Cake

This isn't exactly a healthy recipe, but it could be made healthy if you used Splenda! I've never even had sweet potatoes, but my sister and I were needing to use up some pecans, and I found this recipe! It's actually for 2 1/2 dozen cupcakes, but we made it into a cake for the sake of traveling.

Batter:
40 oz. of sweet potatoes, canned or boiled; mashed
1 cup olive oil
4 eggs
2 teaspoons vanilla extract
1 teaspoon maple extract
2 cups brown sugar sugar
2 cups flour
2 teaspoons baking powder
1 teaspoon salt
1 teaspoon cinnamon
1/2 teaspoon nutmeg
1/4 teaspoon ginger

Pecans:
2/3 cup pecans (or walnuts)
1 tablespoon butter
1/4 cup brown sugar


Preheat the oven to 375Âş. Whisk together (we used a blender) the mashed potatoes, olive oil, eggs, vanilla, maple extract, and brown sugar. In a separate bowl, whisk together the flour, baking powder, salt, cinnamon, nutmeg, and ginger. Add to the sweet potato mixture and whisk until combined. Bake for about 12-15 minutes or until a toothpick comes out clean. We frosted using one container of store-bought cream cheese frosting.

Now for the pecans. First, grease a large sheet of parchment paper. Put the pecans in a large pan on the stove on medium heat. Add the butter and brown sugar. Stir, scraping the bottom well, until all the sugar is melted and completely liquid. Spread the pecans on the parchment paper, separating them with the spatula so that they don't clump together. Once cooled, top the frosted cupcakes with pecans.

No rating for this recipe - I wouldn't classify it as healthy or cheap, but definitely good for the holidays!

Saturday, December 10, 2011

Chocolate Popcorn

I had never heard of chocolate popcorn before last week.... or least not that I remembered. And now, I just want to eat it all the time!

I made it to take to a Christmas party, and I plan on making some for the family over the holidays.


Six bags of popcorn requires 1 package of almond bark.
(I used light buttered popcorn and white almond bark.)

Melt the almond bark on the stove; I split the package in half and melted each half separately, due to the size of my pans. It's also easier to pop a bag of popcorn, drizzle some chocolate over it and shake it up. Each time you add a bag of popcorn to the bowl, drizzle some more chocolate on it. The first batch we attempted to drizzle all the chocolate over all the popcorn, which didn't work well at all.

[In case you've never dealt with almond bark, stack two similar pans on top of each other. Fill the smaller one with a little less than half of water; it will go on the bottom. The bigger one will partially sit on/lean into the other pan, but won't touch the water.] 

When it's all said and done, it still looks like normal popcorn, for the most part. The first time I ate it, I thought it was just normal popcorn. So, don't expect it to be covered thickly with chocolate!


Rating: Not the absolute healthiest treat, but there are far worse! I just love how easy it is to make :)


Monday, November 21, 2011

Spaghetti Squash with Garlic Chicken

Since my parents were coming to visit, Taylor and I decided we should fix something a little fancier (and maybe not as "strange" as quinoa)... and my family loves squash, so we decided this was the best bet.

I had never cooked spaghetti squash, and didn't think I had ever eaten it either - but my parents informed me that wasn't true. First thing you should know about cooking spaghetti squash: it's not easy to cut. There's also a few different ways to cook it. I baked mine (I had a bad feeling about microwaving it, especially with warnings about "Squash Explosion" possibilities) and it worked well. I followed these instructions. [ignore my ugly pan...]


We combined it with diced tomatoes and onions, salt and pepper, a little olive oil, and some feta cheese. I didn't even have a very large spaghetti squash, and it made about seven servings!


Now the recipe for the chicken, we followed exactly as we were told, but had a few problems. The breading mix wasn't dry at all, and therefore didn't stick onto the chicken very well. We used two large chicken breasts (since this was a meal for four), so we ran out of our breading (and just dipped the last few slices of chicken in Italian seasoning crumbs).

We also baked the chicken as well, since frying it didn't seem so healthy. The chicken tasted great, even if it didn't get coated quite properly. And, we finished off the meal with some pumpkin pie shakes.


Rating: This meal took a little more time and concentration to make, but turned out delicious!

Friday, November 18, 2011

Stacked Roasted Vegetable Enchiladas

Healthy enchiladas? Yes, please! I could've probably just eaten the roasted veggies by themselves. This recipe takes a little more prep and cooking time, but it's so worth it!


2 bell peppers, (one red, one green) cut into matchsticks
1/2 head of cauliflower, cut into 1/2-inch chunks
1 small potato, peeled and cut into 1/2-inch cubes (about 1 1/2 cups)
1 medium onion, halved and slivered
1 cup corn kernels, fresh or frozen
1-2 cups of green beans (optional)
Vegetable oil
1 1/2 tsp. ground cumin
2 garlic cloves, minced
salt and black pepper
2 cups homemade or store bought salsa/pico de gallo
2 ounces baby spinach leaves (about 2 big handfuls)
9-10 corn tortillas, halved
2 cups shredded cheese


Preheat the oven to 425 degrees. Lightly oil a large shallow roasting pan or rimmed cookie sheet.

Place bell peppers, cauliflower, potato, onion, green beans, and corn kernels onto cookie sheet. Drizzle olive oil and sprinkle the cumin and minced garlic over top. Add a generous pinch or two of salt and black pepper, then use your hands to mix everything together. After everything is coated well, spread the vegetables evenly in the pan. Roast for 30 minutes until vegetables are tender and begin to brown in spots. Stir or shake the pan every 10 minutes for even roasting.  Remove pan from oven and reduce oven temperature to 350 degrees.

Prepare a 9x12 baking pan with nonstick spray. Spread 1/4 cup of salsa into the bottom of the baking pan. Add a layer of tortilla halves, to completely cover the salsa. Top with 1/3 of the vegetables, a handful of spinach, and 1/3 of the cheese. Make a second layer of tortilla, salsa, vegetables, spinach, and cheese. Top with with a layer of tortillas, salsa, vegetables, and cheese. Cover with aluminum foil.

Bake for 20 minutes. Remove the foil and bake another 10 minutes, until cheese is melted and everything is heated through.

Let it sit for 5 minutes and cut into squares.


[Feel free to switch out the vegetables or cheese for those you like, add some beans or shredded chicken if your family prefers, or even use flour tortillas if you don't have (or like) corn.]

Rating: Another vegetable-heavy recipe, and even with the tortillas - it's healthy, and affordable!


Pumpkin Pie Shake

If you haven't figured it out already, I love pumpkin. After the last smoothie turned out awesome, I now want to try every smoothie. This recipe caught my attention, and as usual... I altered it just a little! I used slightly less healthy ingredients than it originally called for (like soy milk), and lessened the amount of ingredients so it would fit in my magic bullet!


1/4 banana (peeled, diced)
1/3 cup pumpkin puree (Libby’s)
1/3 cup FF plain yogurt
1/2 cup 1% milk (or milk of choice)
Few shakes of pumpkin spice and cinnamon
1 tsp. vanilla
2 ice cubes
2 packets of Splenda
Throw in some oatmeal if you want!


Mix together, and enjoy! This adds up to be about 200 calories.

Rating: The ingredients needed for this recipe will last long enough you could make this several times, which helps make it more cost efficient! And, it's decently healthy!


Pumpkin Spice Peanut Butter Granola

I love pumpkin, and I love granola. And to my luck, I came across this pumpkin spice granola recipe. I changed it up a little, and it's so good! I lessened the sugary ingredients to make it healthier (and more diabetic friendly).


6 cups old-fashioned oats (not instant)
3/4 cup pumpkin puree
1/2 cup brown sugar
2 tsp. honey
2 tsp. vanilla
1 tsp. cinnamon
1 tsp. pumpkin spice
1/2 tsp salt
1 Tbsp. peanut butter (optional) 

 
Preheat oven to 325 degrees. Place oats in a large bowl. In a separate smaller bowl, mix together pumpkin, brown sugar, honey, vanilla, spices, and salt. Pour over oats and mix together until everything is moistened. Spread evenly onto a large silpat or parchment lined cookie sheet (or 2 smaller ones). (If you don't have a silpat or parchment or wax paper to line the pan, you can just lightly grease it, which is what I did.) 
 
Bake in oven for about 15-20 minutes. Take out pan. Using a large spatula, flip the granola in batches. Disturb it as little as you can if you like lots of clusters. If you don't care about clusters, just stir it around as much as you please and break it up a bit with your spoon or spatula. Place back in oven and bake for about 10-20 more minutes. It will kind of depend on oven temp and how thin you're able to spread the granola on your pan(s). 
 
Remove from oven and allow to cool undisturbed. It should continue to crunch up as it cools.  Once cool, break up any clusters you feel are too large. If you want, mix in a few handfuls of chopped almonds and craisins and store in an airtight container. 

I had some granola start to burn around the edge of the pan, so I turned down the temp just a little bit. My baking time increased because I didn't have enough pans so I had to rotate and do a few batches. I didn't cluster together as much as I should have, so right now I have a big mixture of some clusters, and some loose granola. But, that's okay because I eat granola plain, in yogurt, as cereal, in smoothies, etc.


Rating: This recipe was really easy, and quick to make! Not to mention, you can eat granola with a lot of things, and it's healthy!


Wednesday, November 16, 2011

PB&J Wrap

I've been wanting to try this recipe for about a week now, and finally got to try it tonight, but I altered it just a little bit. It'll probably be my dessert replacement from now on :)


I used a whole wheat tortilla (even though I normally eat corn tortillas),
frozen strawberries (thawed),
half of a banana
and natural peanut butter.

I should've looked closer at the strawberries. Fresh strawberries are out of season, and therefore more expensive, so I bought frozen strawberries, but they have a lot of extra sugar added in (35g). I needed to thaw the strawberries, so I just popped 'em in the microwave for 30 seconds, and a lot of the extra juice spilled off. So, I'll probably thaw the whole container, drain it and rinse the strawberries.

This was a really good snack, but it's not as filling for as many calories it contains (about 400).

Rating:

Tuesday, November 15, 2011

Butternut Squash and Red Onion Pizza

I got this recipe out of a Rachael Ray magazine. There were a few ingredients that I did not want to spend money on, so I just left them out (radicchio and parsley). I also used butternut squash that came pre-cut, and in a bag. It was much easier than having to buy a whole stinkin' squash and then peel and cut it.

1/3 butternut squash, peeled and cut into 1/2 inch cubes (1 1/4 cups)
1/2 cup extra-virgin olive oil
Salt and pepper
1 clove garlic, finely chopped
2 tablespoons chopped parsley (optional)
1/4 radicchio, cored and cut into 1/2 inch strips (optional)
1/4 red onion, thinly sliced
1 pound refrigerated pizza dough at room temperature
8 ounces mozzarella cheese, cut into 1/2 inch cubes

Serves 4; Prep time - 20 minutes; Bake - 15 minutes


1. Preheat oven to 475 degrees.

2. Line a baking sheet with parchment, toss butternut squash with 1 tablespoon of the olive oil. Season with salt and pepper.

3. Roast butternut squash in oven until golden (about 12 minutes).

4. In a small bowl, combine garlic and parsley with 2 tablespoons of olive oil, season with salt and pepper.

5. In a larger bowl, combine radicchio and onion with 1 tablespoon of olive oil and season with salt and pepper. Add the butternut squash and toss.

6. Line the baking sheet with new parchment (I just spread flour over the baking sheet). Stretch dough out on baking sheet and smear the garlic mixture on the dough.

7. Sprinkle with the cheese and then the squash mixture.

8. Bake in the oven for 15 minutes or until crust is golden brown.

When tossing the butternut squash with the olive oil, I accidentally used a 1/4 of a cup instead of a 1 tablespoon. Oops. It turned out fine, I just had to drain the excess olive oil.

This recipe tasted really good and was very different from any pizza I have had. You could make it healthier by using a low-fat cheese or a whole wheat pizza crust. Also, not using 1/4 cup of olive oil wouldn't hurt either. Overall, this is a good recipe if you want something healthier and a little more unique than delivery pizza.


Rating:  The ingredients weren't too expensive. But just so the rest of the garlic and red onion don't go to waste, I would recommend finding other recipes that use those ingredients.

Sunday, November 13, 2011

Zucchini Boats

Zucchini is one of my favorite vegetables - I could probably eat it every day (that's why it gets its own label on the side of the blog). Taylor found this recipe, and it turned out to be another big success! The only problem we had, is this recipe (found here) is meant for large zucchini... and the store only had small/medium ones.


1 tbsp sour cream
1/4 to 1/2 tsp salt and pepper
1/2 tomato
2 tsp thyme
2 zucchinis
1 onion
Cheese

Preheat your oven to 400 degrees.

Slice them in half length-ways. You can trim the ends if you like. Spoon out the guts. Just take it out (leave about 1/2 an inch in) until you end up with boat like shells.
 
Now give the zucchini pulp a good chop, also chop a small onion and 1/2 a tomato while you’re at it. Sautee the onions in one tbsp oil or butter.

Now (in no particular order), add the thyme, salt pepper, sour cream, the zucchini pulp, and the tomato. Lightly butter a baking dish and put the zucchini boats in. Grab a spoon and fill the shells with the mix. Sprinkle some aged cheese on top. Put them in a preheated oven, give them about 20 minutes and then turn on the grill until the top is golden brown.


Rating: The only hard part about this recipe was spooning out the zucchini, otherwise super easy to make... and very cheap! It was pretty filling too.

Saturday, November 12, 2011

Quinoa Salad

Quinoa is not something I cook with regularly, and hadn't really heard of it before trying this recipe – but it's super healthy and yummy. I found this recipe, and thought I'd give it a try... turned out so good!
 
1 cup quinoa* (I used the Garden Vegetable flavor)
1 can of vegetable or chicken broth
2 cups frozen shelled edamame, thawed (10 ounces)
2 Tbsp. lemon juice
2 Tbsp. extra-virgin olive oil
1/2 tsp. salt
1/2 cup diced bell pepper (red or green)
1/4 cup chopped walnuts, preferably toasted**


1. Toast quinoa in a dry skillet over medium heat, stirring often, until it becomes aromatic and begins to crackle, about 5 minutes. (The instructions said to rinse, but since my quinoa was flavored, it created a broth when I added water to it... so I lost some of the taste from it.)

2. Meanwhile, bring broth to a boil in a medium saucepan over high heat. Add the quinoa and return to a boil. Cover, reduce heat to a simmer and cook gently for 8 minutes. Remove the lid and, without disturbing the quinoa, add edamame. Cover and continue to cook until the edamame and quinoa are tender, 7 to 8 minutes longer. Drain any remaining water, if necessary.

3. Whisk lemon juice, oil, and salt in a large bowl. Then combine with peppers, walnuts and the quinoa mixture.


*Note: Quinoa is a delicately flavored grain that was a staple in the ancient Incas' diet. It is available in most natural-foods stores and the natural-foods sections of many supermarkets. Toasting the grain before cooking enhances its flavor and rinsing removes any residue of saponin, quinoa's natural, bitter protective covering.

**To toast walnuts: Cook in a small dry skillet over medium-low heat, stirring constantly, until fragrant, 2 to 4 minutes. (Don't let them burn like I did!)

Rating: The quinoa was the most expensive part, but I'm going to look around to see if there's a cheaper place to buy it, and in a bigger portion. Otherwise, a very affordable and healthy meal.

Friday, November 11, 2011

Blueberry Oatmeal Breakfast Shake

Taylor and I tried this new, delicious shake this morning (adapted from this recipe). It makes a lot; we probably should have split the shake in half. I would recommend either splitting it with someone, or divvy it up so you can have it for breakfast over the next few days.


1/2 cup ice cubes
1 very ripe banana
4 oz. fresh blueberries
2 Tbsp. natural peanut butter
1/3 cup instant oatmeal
1 cup of milk

You'll need a blender, a magic bullet isn't big enough. We drank it immediately, but it you want it to set and thicken a little, stick it in the fridge for awhile.

[I actually cut down the recipe to fit in my magic bullet, because I don't have a blender and this smoothie is too good to not eat every week! I did 1 ice cube, 1/4 banana, 1 oz. blueberries, 1 Tbsp. natural peanut butter, 1/4 cut oatmeal and 1/4 cup milk. It filled it up about 3/4 the way, but then only had about half a cup or less to drink... so I may try adding more halfway through next time.]

Rating: Incredibly healthy, and reasonably priced (plus you'll have enough ingredients to make multiple shakes!)

Sunday, November 6, 2011

Summer Vegetable Pasta Salad

So, here is my latest cooking endeavor - one that I can already see will be repeated many times as it is healthy and incredibly easy to make - and not to mention, delicious. I got the recipe from Budget Bytes - a new favorite website of mine.


Ingredients
12 oz. bow tie pasta (I ended up having to use a different pasta)
2 medium roma tomatoes
1 medium summer squash
1 medium zucchini
1 medium broccoli crown
1/2 medium red onion
1/2 bunch parsley

Vinaigrette
1/4 cup vegetable oil
1/4 cup olive oil
1/3 cup red wine vinegar
1 Tbsp dijon mustard
1 tsp dried oregano (used cilantro instead)
1 tsp minced garlic
3/4 tsp salt
to taste: fresh cracked black pepper


[I'm at the point right now where if it's too expensive or if I'm not crazy about it, I just leave it out. Yes, I know, not the best technique but it's worked so far. What's italicized in the ingredients, I left out. Yes, I realize that's not really a "vinaigrette" with it being just oil... but it still tasted great!]

STEP 1: Bring a large pot of lightly salted water to a boil. Add the pasta and boil for 5-7 minutes or until tender. Drain in a colander.

STEP 2: While you're waiting for the pasta water to boil and the pasta to cook, prepare the vegetables (squash, zucchini, broccoli, tomato, onion, parsley, red pepper). Give the vegetables a good wash and then cut into bite sized pieces (onions and red pepper thinly sliced; parsley removed from stems and chopped).

STEP 3: While the pasta is cooling, prepare the vinaigrette. In a small bowl whisk together the vegetable oil, olive oil, red wine vinegar, dijon mustard, oregano, minced garlic, salt, and pepper.

STEP 4: Combine the cooked pasta, chopped vegetables, and vinaigrette. Stir until everything is well mixed and coated with vinaigrette. Serve immediately or refrigerate until ready to eat.


Rating: One of the easiest recipes I've ever made, and cheap too!