Showing posts with label entrees. Show all posts

Thursday, February 9, 2012

Salad in a Jar

Yes, you read that title correctly. Some of you may have seen me talking about this already, but in case you haven't seen it or tried it - I'm here to show you.

I love a good salad. (I'm known to go to Olive Garden and just eat salad.) But, it's hard to conveniently take a salad to work... unless you put it in a jar.

Buy a mason jar, and all your salad ingredients.

Put your dressing on the bottom (it's kind of a guessing game as to how much...), and then all your toppings in after that.

I've been doing quinoa, dried cranberries, bell pepper, mushrooms, tomatoes, cheese. For my meat, I either use canned chicken or torn up deli meat (you better believe it's turkey, no way is it ham!)

The MOST important part of this trick is that your dressing is on the very top, and your lettuce/spinach is at the very top, with your toppings in the middle. I would say my jar is about half toppings, half lettuce. Make sure to leave some room at the top, because if it's too full, it doesn't shake up very well.


Take your jar to work (luckily I have a huge supply of plastic forks I can use up!), and when you're ready to eat, just shake it up! It usually takes a few minutes to shake up - I shake it every which way possible to mix it good enough.

Presto! I usually get some weird looks if people walk into my little office and I'm eating out of a mason jar, but they realize how good of an idea it is once I explain. :) I usually eat some crackers of some sort to go along with my salad. Either saltines + turkey pepperoni, or Cheez-its. (Fun fact: Cheez-its and Teddy Grahams are healthier than Club Crackers; no high fructose corn syrup or partially hydrogenated oil!)

(No rating for this post - healthiness and cost differ on what you use!)

Thursday, January 26, 2012

Mini Mexican Pizzas

I am a sucker for Taco Bell... and all things that are actually Mexican food. So, I saw this healthy option for a new Mexican dish, and decided it was worth a shot. SO good! And, as usual, incredibly easy to make.

You'll need:
 - 3-4 large whole wheat tortilla’s, or enough to cut out 12 small circles (I use La Tortilla Smart & Delicious LowCarb/High Fiber Tortillas)
- 1 pound of hamburger (or turkey meat)
- 1/2 cup salsa of choice
- Dry taco seasoning
- 1/2 cup low fat mozzarella
- Optional Toppings: sliced black olives, bell peppers, chopped tomatoes
- Muffin pan


Preheat oven to 425 degrees.

Cook the hamburger meat, and mix in the taco seasoning.

Use an empty can, glass cup, or cookie cutter to cut 3-4 medium circles out of each tortilla. Make sure to spray the pan! Press the circles into each muffin cup using your fingers. It doesn't have to go reach up to the rim of each cup, but it'll make it cleaner! Mix together the meat, salsa, and toppings. Stir until well combined. Scoop a tablespoon (or so) of the mixture into each tortilla. Top with cheese and olives.

Bake for 12-15 minutes. (My oven can be a little crazy sometimes, but I only cooked mine for five...)

Rating:

Thursday, January 19, 2012

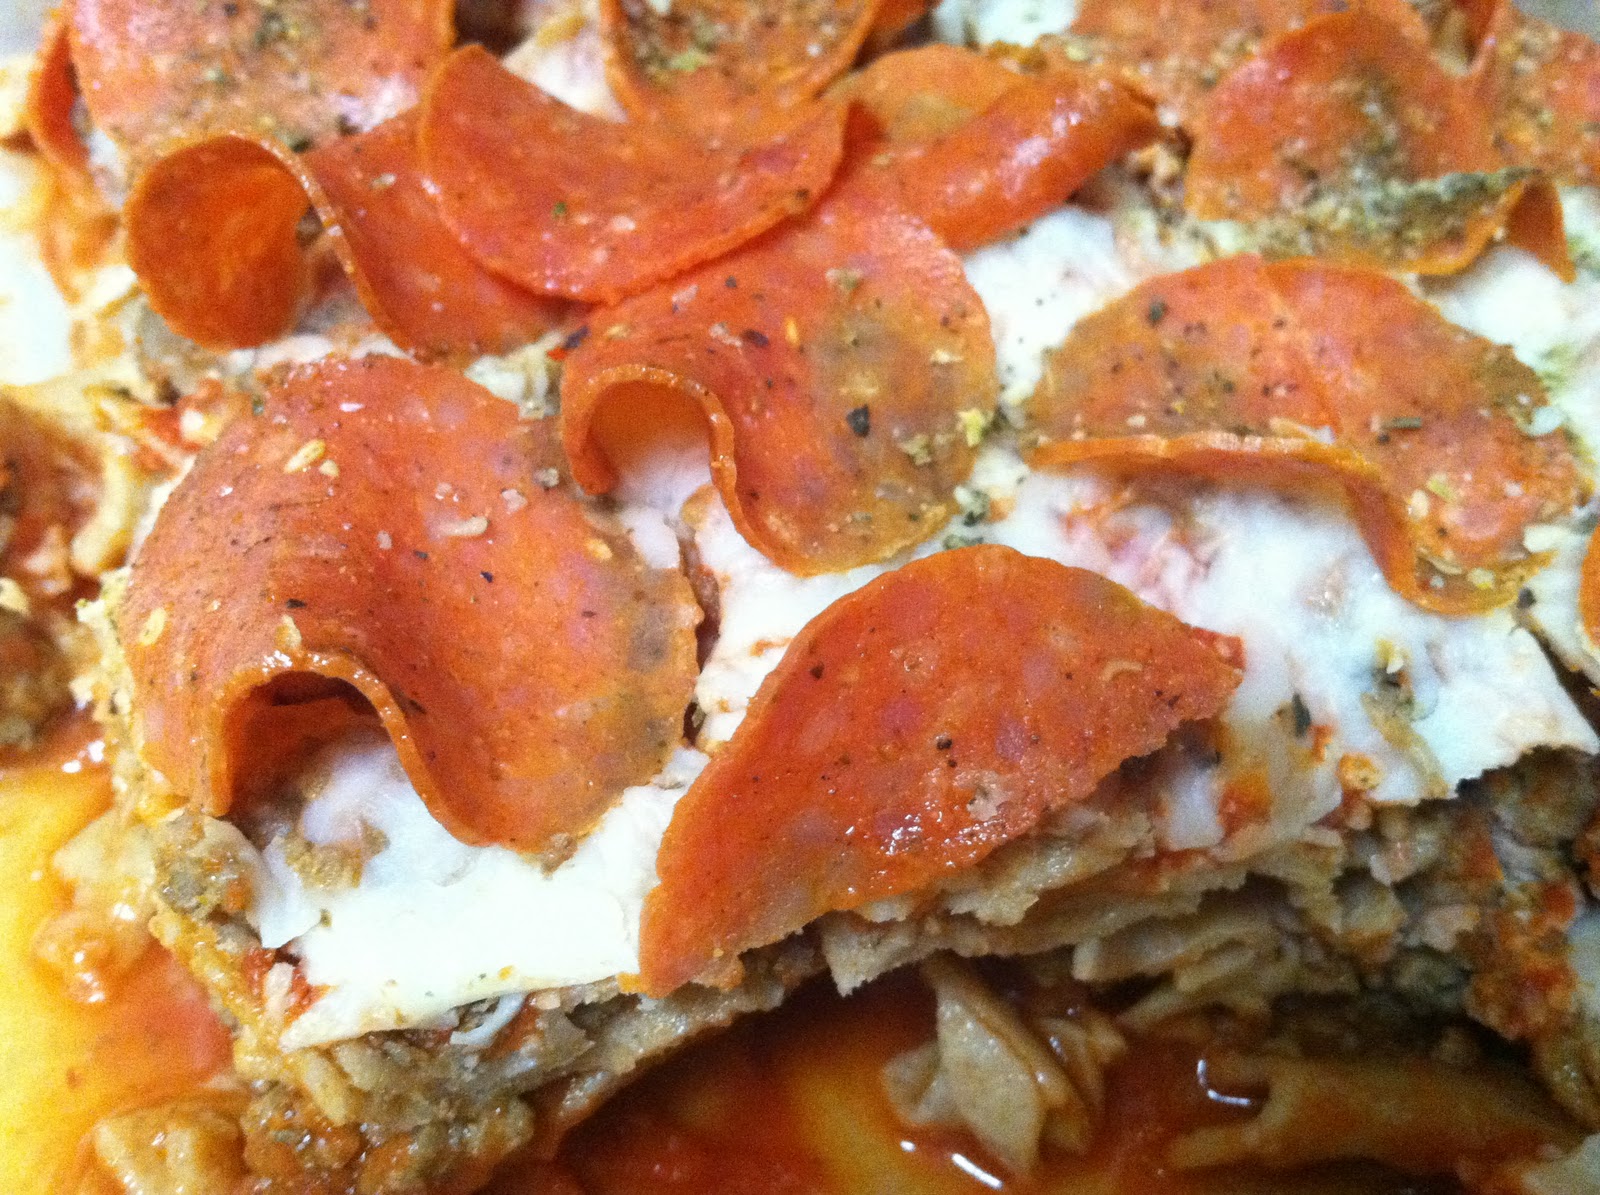
Pizza Casserole

Okay, so another little splurge on this recipe. But, I would consider it a little healthier than pizza, and its easy to make!

You'll need:
1 bag of egg noodles (I bought whole grain!)
1 extra large can of pizza or spaghetti sauce
3 cups of mozzarella cheese (or more if you like cheese)
1 1/2 pounds of hamburger meat (or sausage, turkey meat, etc.)
1 package of turkey pepperoni


Preheat the oven to 350.

Cook your hamburger and noodles.

The rest is layering... I used a cake pan, but you can use a glass dish as well.

Spread a thin layer of sauce,
then half the noodles,
half the meat,
half the sauce,
rest of the noodles,
(somewhere in here, sprinkle in some Italian seasoning!)
half the cheese,
rest of the meat,
rest of the sauce,
rest of the cheese,
and then layer pepperoni on top!


Cover with foil and bake for 30 minutes.
Then, remove the foil and bake for another 15 minutes.

Let it cool for 10 minutes or so - this is important to let everything settle, otherwise it'll just fall apart.


Rating:

Monday, November 21, 2011

Spaghetti Squash with Garlic Chicken

Since my parents were coming to visit, Taylor and I decided we should fix something a little fancier (and maybe not as "strange" as quinoa)... and my family loves squash, so we decided this was the best bet.

I had never cooked spaghetti squash, and didn't think I had ever eaten it either - but my parents informed me that wasn't true. First thing you should know about cooking spaghetti squash: it's not easy to cut. There's also a few different ways to cook it. I baked mine (I had a bad feeling about microwaving it, especially with warnings about "Squash Explosion" possibilities) and it worked well. I followed these instructions. [ignore my ugly pan...]


We combined it with diced tomatoes and onions, salt and pepper, a little olive oil, and some feta cheese. I didn't even have a very large spaghetti squash, and it made about seven servings!


Now the recipe for the chicken, we followed exactly as we were told, but had a few problems. The breading mix wasn't dry at all, and therefore didn't stick onto the chicken very well. We used two large chicken breasts (since this was a meal for four), so we ran out of our breading (and just dipped the last few slices of chicken in Italian seasoning crumbs).

We also baked the chicken as well, since frying it didn't seem so healthy. The chicken tasted great, even if it didn't get coated quite properly. And, we finished off the meal with some pumpkin pie shakes.


Rating: This meal took a little more time and concentration to make, but turned out delicious!

Friday, November 18, 2011

Stacked Roasted Vegetable Enchiladas

Healthy enchiladas? Yes, please! I could've probably just eaten the roasted veggies by themselves. This recipe takes a little more prep and cooking time, but it's so worth it!


2 bell peppers, (one red, one green) cut into matchsticks
1/2 head of cauliflower, cut into 1/2-inch chunks
1 small potato, peeled and cut into 1/2-inch cubes (about 1 1/2 cups)
1 medium onion, halved and slivered
1 cup corn kernels, fresh or frozen
1-2 cups of green beans (optional)
Vegetable oil
1 1/2 tsp. ground cumin
2 garlic cloves, minced
salt and black pepper
2 cups homemade or store bought salsa/pico de gallo
2 ounces baby spinach leaves (about 2 big handfuls)
9-10 corn tortillas, halved
2 cups shredded cheese


Preheat the oven to 425 degrees. Lightly oil a large shallow roasting pan or rimmed cookie sheet.

Place bell peppers, cauliflower, potato, onion, green beans, and corn kernels onto cookie sheet. Drizzle olive oil and sprinkle the cumin and minced garlic over top. Add a generous pinch or two of salt and black pepper, then use your hands to mix everything together. After everything is coated well, spread the vegetables evenly in the pan. Roast for 30 minutes until vegetables are tender and begin to brown in spots. Stir or shake the pan every 10 minutes for even roasting.  Remove pan from oven and reduce oven temperature to 350 degrees.

Prepare a 9x12 baking pan with nonstick spray. Spread 1/4 cup of salsa into the bottom of the baking pan. Add a layer of tortilla halves, to completely cover the salsa. Top with 1/3 of the vegetables, a handful of spinach, and 1/3 of the cheese. Make a second layer of tortilla, salsa, vegetables, spinach, and cheese. Top with with a layer of tortillas, salsa, vegetables, and cheese. Cover with aluminum foil.

Bake for 20 minutes. Remove the foil and bake another 10 minutes, until cheese is melted and everything is heated through.

Let it sit for 5 minutes and cut into squares.


[Feel free to switch out the vegetables or cheese for those you like, add some beans or shredded chicken if your family prefers, or even use flour tortillas if you don't have (or like) corn.]

Rating: Another vegetable-heavy recipe, and even with the tortillas - it's healthy, and affordable!


Tuesday, November 15, 2011

Butternut Squash and Red Onion Pizza

I got this recipe out of a Rachael Ray magazine. There were a few ingredients that I did not want to spend money on, so I just left them out (radicchio and parsley). I also used butternut squash that came pre-cut, and in a bag. It was much easier than having to buy a whole stinkin' squash and then peel and cut it.

1/3 butternut squash, peeled and cut into 1/2 inch cubes (1 1/4 cups)
1/2 cup extra-virgin olive oil
Salt and pepper
1 clove garlic, finely chopped
2 tablespoons chopped parsley (optional)
1/4 radicchio, cored and cut into 1/2 inch strips (optional)
1/4 red onion, thinly sliced
1 pound refrigerated pizza dough at room temperature
8 ounces mozzarella cheese, cut into 1/2 inch cubes

Serves 4; Prep time - 20 minutes; Bake - 15 minutes


1. Preheat oven to 475 degrees.

2. Line a baking sheet with parchment, toss butternut squash with 1 tablespoon of the olive oil. Season with salt and pepper.

3. Roast butternut squash in oven until golden (about 12 minutes).

4. In a small bowl, combine garlic and parsley with 2 tablespoons of olive oil, season with salt and pepper.

5. In a larger bowl, combine radicchio and onion with 1 tablespoon of olive oil and season with salt and pepper. Add the butternut squash and toss.

6. Line the baking sheet with new parchment (I just spread flour over the baking sheet). Stretch dough out on baking sheet and smear the garlic mixture on the dough.

7. Sprinkle with the cheese and then the squash mixture.

8. Bake in the oven for 15 minutes or until crust is golden brown.

When tossing the butternut squash with the olive oil, I accidentally used a 1/4 of a cup instead of a 1 tablespoon. Oops. It turned out fine, I just had to drain the excess olive oil.

This recipe tasted really good and was very different from any pizza I have had. You could make it healthier by using a low-fat cheese or a whole wheat pizza crust. Also, not using 1/4 cup of olive oil wouldn't hurt either. Overall, this is a good recipe if you want something healthier and a little more unique than delivery pizza.


Rating:  The ingredients weren't too expensive. But just so the rest of the garlic and red onion don't go to waste, I would recommend finding other recipes that use those ingredients.

Sunday, November 13, 2011

Zucchini Boats

Zucchini is one of my favorite vegetables - I could probably eat it every day (that's why it gets its own label on the side of the blog). Taylor found this recipe, and it turned out to be another big success! The only problem we had, is this recipe (found here) is meant for large zucchini... and the store only had small/medium ones.


1 tbsp sour cream
1/4 to 1/2 tsp salt and pepper
1/2 tomato
2 tsp thyme
2 zucchinis
1 onion
Cheese

Preheat your oven to 400 degrees.

Slice them in half length-ways. You can trim the ends if you like. Spoon out the guts. Just take it out (leave about 1/2 an inch in) until you end up with boat like shells.
 
Now give the zucchini pulp a good chop, also chop a small onion and 1/2 a tomato while you’re at it. Sautee the onions in one tbsp oil or butter.

Now (in no particular order), add the thyme, salt pepper, sour cream, the zucchini pulp, and the tomato. Lightly butter a baking dish and put the zucchini boats in. Grab a spoon and fill the shells with the mix. Sprinkle some aged cheese on top. Put them in a preheated oven, give them about 20 minutes and then turn on the grill until the top is golden brown.


Rating: The only hard part about this recipe was spooning out the zucchini, otherwise super easy to make... and very cheap! It was pretty filling too.

Sunday, October 16, 2011

Cauliflower Crusted Veggie Pizza

I know, it sounds weird, maybe even gross. If you eat turkey burgers, or ground turkey, instead of hamburger meat - and think it tastes the same... this is the same way. There is a little different texture, but same taste. We ate the entire pizza between two of us (shhh...)


1 cup cooked, riced cauliflower
1 cup shredded mozzarella cheese
1 egg, beaten
1 tsp dried oregano
1/2 tsp crushed garlic
1/2 tsp garlic salt
olive oil (optional)

choose your preference of pizza sauce, shredded cheese and toppings.

To "Rice" the Cauliflower:

Take 1 large head of fresh cauliflower, remove stems and leaves, and chop the florets into chunks. Add to food processor and pulse until it looks like grain. Do not over-do pulse or you will puree it. (If you don't have a food processor, you can grate the whole head with a cheese grater). Place the riced cauliflower into a microwave safe bowl and microwave for 8 minutes. There is no need to add water, as the natural moisture in the cauliflower is enough to cook itself.

One large head should produce approximately 3 cups of riced cauliflower. The remainder can be used to make additional pizza crusts immediately, or can be stored in the refrigerator for up to one week.

To Make the Pizza Crust:
Preheat oven to 450 degrees. Spray a cookie sheet with non-stick cooking spray.

In a medium bowl, stir together 1 cup cauliflower, egg and mozzarella. Add oregano, crushed garlic and garlic salt, stir. Transfer to the cookie sheet, and using your hands, pat out into a 9" round.

Optional: Brush olive oil over top of mixture to help with browning.

Bake at 450 degrees for 15 minutes.

Remove from oven. To the crust, add sauce, toppings and cheese. Place under a broiler at high heat just until cheese is melted (approximately 3-4 minutes).
Enjoy!

*Note that toppings need to be precooked since you are only broiling for a few minutes.


Rating: Since we made ours veggie only, there was no meat and, obviously, no bread - so healthy!